- You may carry your unused colors along the back of your work or you may choose to work over your unused colors. Sometimes carried ends show through to the right side of your work. Using tighter stitches can help correct this. We carry all of our colors in our samples. We do this so nothing shows through on the right side for photography and because our model makers prefer to do it that way. I have heard of sewing a backing on the wrong side to cover up ends.
- Whenever you have a pattern that calls for cross stitching you can change the colors while crocheting verses cross stitching afterwards.
To Change Colors
Work last stitch before color change to last step (2 loops on hook), drop unused color to wrong side; with new color, YO and pull through 2 lps on hook. You may work over unused color or carry it across the back of work.
STILL CONFUSED?
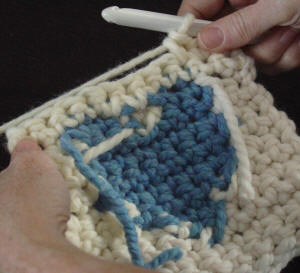
Try this pattern along with Maggie as she shows you how to crochet a blue heart on a cream background for practice.
DIRECTIONS
Off White = MC (main color) Blue = CC (contrasting color)
Row 1 (right side): Ch 12, sc in 2nd ch from hook and in each ch across. (11 sc)
Row 2 (wrong side): Ch 1, turn, sc in each sc across.
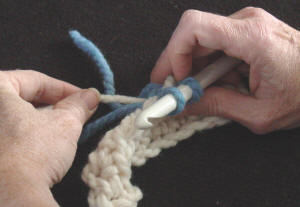
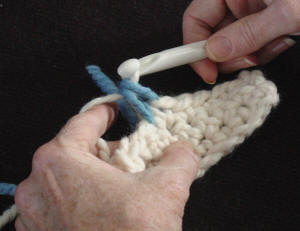
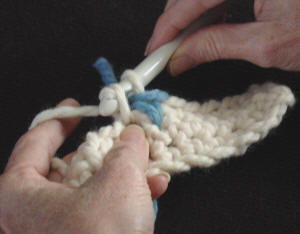
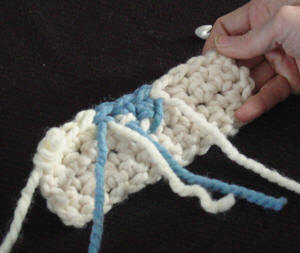
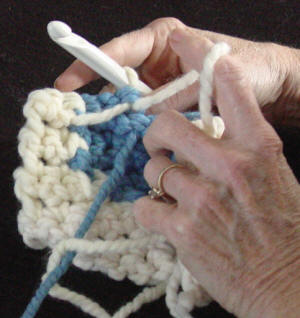
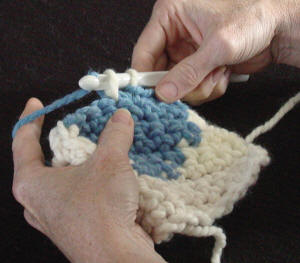
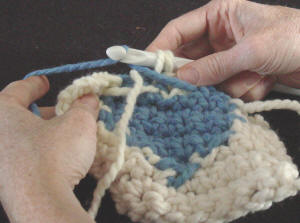
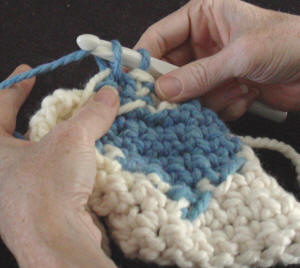
Row 3: Ch 1, sc in next 5 sc, drop MC (see picture #1) and change to CC (see picture #2-3)
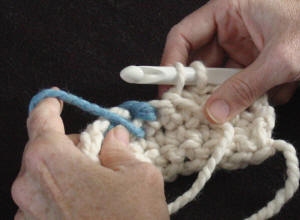
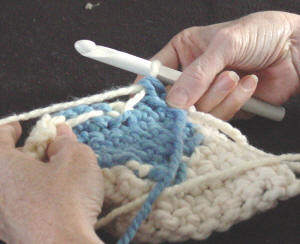
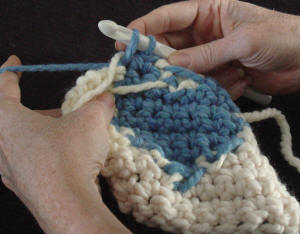
with CC sc in next sc (see picture #4), drop CC, change to MC (see picture #5-7), with MC sc in next 5 sc (see picture #8).
Row 4: Ch 1 turn, sc in next 4 sc, drop MC (see picture #9)and change to CC (see picture #10-11); with CC sc in next 3 sc (see picture #12), drop CC and change to a second ball of MC (see picture #13); with MC sc in last 4 sc (see picture #14).
Row 5: Ch 1, turn, sc in next 3 sc, drop MC and change to CC (see picture #15); with CC sc in next 5 sc, drop CC and change MC; with MC sc in last 4 sc .
Rows 6-8: Ch 1, turn, sc in next 2 sc, drop MC and change to CC; with CC sc in next 7 sc, drop CC and change MC; with MC sc in last 2 sc.
Row 9: Ch 1, turn, sc in next 2 sc, drop MC and change to CC; with CC sc in next 3 sc, drop CC and change MC (see picture #16-17); with MC sc in next sc, drop MC, change to CC (see picture #18); with CC sc in next 3 sc, drop CC and change MC; with MC sc in last 2 sc.
Row 10: Ch 1, turn, sc in next 2 sc, drop MC and change to CC; with CC sc in next 2 sc, drop CC and change MC (see picture #19-20); with MC sc in next 3 sc, drop MC, change to CC (see picture #21); with CC sc in next 2 sc , drop CC and change MC; with MC sc in last 2 sc.
Row 11: Ch 1, turn, finish off unused colors on wrong side of work, sc in each sc across.
Row 12: Ch 1, turn, sc in each sc across.
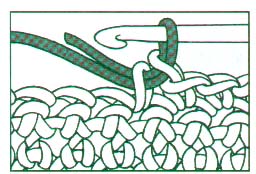
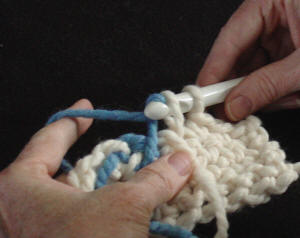
Picture #1 – Right Side
Row 3
First 2 rows complete and start of Row 3. Sc in first 4 sc, yarn over and draw up a lp in next sc.
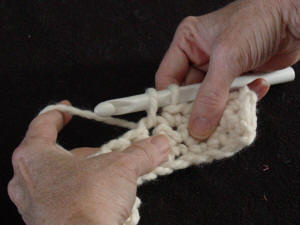
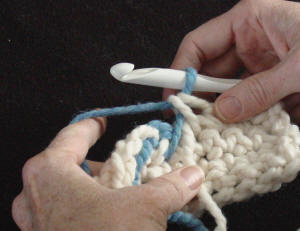
Picture #2 – Right Side
Row 3
Changing from main color (MC) to contrasting color (CC) on 5th sc.
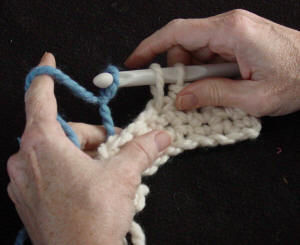
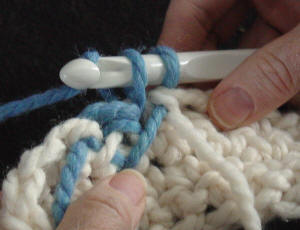
Picture #3 – Right Side
Row 3
5th sc completed and color change complete – you are ready to work 6th sc with new CC color.
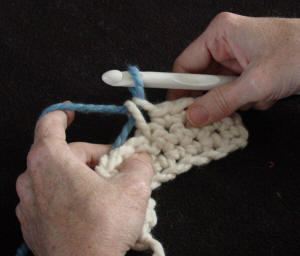
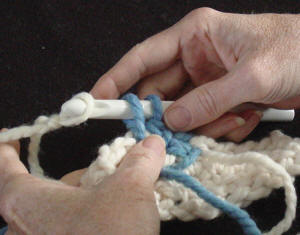
Picture #4 – Right Side
Row 3
Changing from contrasting color (CC) back to main color (MC) to on 6th sc.

Picture #5 – Right Side
Row 3
Shows back of work. Drop contrasting color (CC), pick up main color (MC).
Picture #6 – Right Side
Row 3
Yarn over hook with MC.

Picture #7 – Right Side
Row 3
Draw MC through 2 lps on hook to complete last sc and change to MC.
Picture #8 – Right Side
Row 3
With MC sc in remaining sc of row.
Picture #9 – Wrong Side
Row 4
Drop MC to wrong side
Picture #10 – Wrong Side
Row 4
Draw new color through 2 lps on hook
Picture #11 – Wrong Side
Row 4
Last sc and color change complete
Picture #12 – Wrong Side
Row 4
With CC sc in next 3 sc.
Picture #13 – Wrong Side
Row 4
Add a second ball of MC and draw through 2 lps on hook.
Adding the second ball keeps you from having to carry the MC across the width of the heart.
Picture #14 – Wrong Side
Row 4
This is what the wrong side of piece looks like after Row 4 is complete. The far left and right strands are the 2 balls of MC. Strand #2 is CC. 2 short strands are ends of starting chains.
Picture #15 – Right Side
Right side view – Row 5
Work last stitch before color change to last step (2 lps on hook) drop unused color to wrong side; YO with new color.

Picture #16 – Right Side
Right side view – Row 9
Drop CC and change MC;

Picture #17 – Right Side
Wrong side view of Row 9
MC is carried over on the back.
Another alternative would have been to carry the MC under the 3 CC sc. When you work over the unused strands it keeps the wrong side looking neater but sometimes shows through to the right side.
Picture #18 – Right Side
Right side view – Row 9
Drop MC and change CC;
Picture #19 – Wrong Side
Wrong side view – Row 10
Drop CC and change MC;

Picture #20 – Wrong Side
Wrong side view – Row 10
Drop CC and change MC;
Color change complete.
Picture #21 – Wrong Side
Wrong side view – Row 10
Drop MC and change CC;
Picture #22 – Wrong Side
Wrong side view – Row 10
This picture shows working a single crochet stitch over the unused color.
Picture #23 – Wrong Side
Wrong side view – Row 10
This picture shows the strand that was carried and the strand that was worked over.
Picture #24 – Right Side
Right side view – Row 11
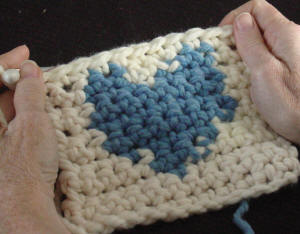
Picture #25 – Wrong Side
Wrong side view – Row 12
Contrasting yarn and extra main color strands have been cut.
Thanks for reading, if you liked this post then you will want to read Changing Colors: Crochet How-To Part 2.
Hugs, Maggie
Be sure to…
Visit my Website
Join me on Facebook
Subscribe to the Maggie Weldon YouTube Channel for crochet lesson videos
Subscribe to Maggie’s Crochet YouTube Channel for product reviews
Sign Up for My Newsletter
Follow us on Pinterest
Follow us on Twitter

No Comments